▲
 The original version of Logitech's Fusion and Orbit cameras had a wide screen format option which I really liked (864x480). It allowed for an image that mimics wide screen TVs. Sadly this format was dropped when the cameras were updated.
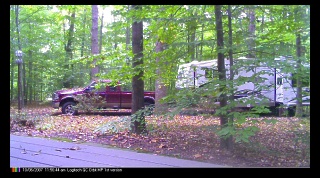
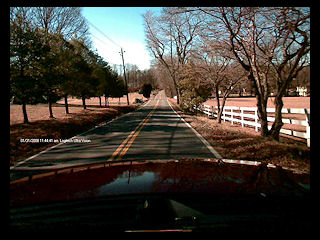
Why am I bothering? Beyond the fact I really like the wide screen format, there are several practical reasons. My truck cam is pointing out the front of my truck and the bottom half of an 800x600 image just shows the hood, windshield wipers and the top of the dashboard. By blanking most of that part out, it not only avoids showing useless items, but by including less detail makes the file size smaller which facilitates faster upload time. (See the "Image Detail" section on my "how large will my camera files be" page.) If I were to point the camera higher, unless I was in a mountain valley, three quarters of the image would show nothing but sky, and that could drastically effect the overall exposure of the image.
For several months I fought with various schemes, without success, to try and obtain that wide format using newer cameras. I tried using the webcam program VisionGS Pro which allows image cropping, but that program was difficult to set up, has become unstable and is apparently no longer being supported. I tried using my favorite graphics program, IrfanView, to automatically crop the images via a batch file, but that could only be done once a minute.
Finally I decided to use some trickery with style sheets and custom overlays and came up with the solution you now see with my truck webcam.
I decided an 800x600 image would give a nice size picture with good detail, but would keep the file size reasonably small for uploading. I constructed a new overlay graphic starting with my standard black rainbow bar, to which I added a block of black to the bottom, making it large enough to cover the lower third of the image and effectively creating a visible image of 800x420 pixels. Note that depending on the specific camera I am using at any given time, this size may be different.
Now came the tricky part. Using a style sheet command referred to as "Absolute Positioning", I was able to position the images inside the popup window exactly where I wanted them in relation to the upper left corner of the window. The second step was to build an html table to contain the text and, again using Absolute Placement positioning, put the table over the bottom part of the image. The second smaller camera thumbnail, and the "Live" graphic are then positioned on top of the others.
The main image has a white border around it, created with a style sheet border attribute. However, since the image actually extends down the page, it caused the white border to stretch down and behind the other elements of the page. To fix this, I created another black rectangular image just large enough to cover the part of the border I didn't want to show, and positioned this graphic in front of the main image, but behind the text table, again using Absolute Positioning commands. This hides the lower part of the image border.
When using Absolute Positioning attributes in style sheets, objects are placed from back to front in the order they occur along the coding of the page. So the first object occuring in the html code, is placed to the back, the next object is placed in front of that, and so forth.
![]()
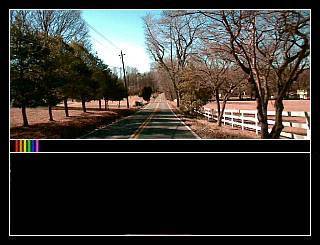
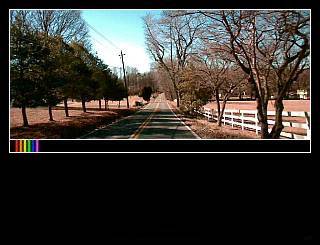
Here is a simplified demonstration of how my truck cam is arranged using Absolute Placement
This first element positions the main image 10 pixels down from the top and 10 pixels from the left side
<img src="WebCam23_.jpg" width="864" height="480" style="POSITION: Absolute; LEFT: 10px; TOP: 10px; border: 1px solid white;">
This second element positions the blank graphic over the lower part and in front of the first image <img src="blank.jpg" width="866" height="200" style="POSITION: Absolute; LEFT: 9px; TOP: 280px;">
This third element forms a table to hold the text and positions this over the lower part of the images <table border="0" Style="POSITION: Absolute; LEFT: 110px; TOP: 485px;"><tr><td width="600" height="131">30 second refresh. This page for dialup connections.</td></tr></table>
Those in the US who are familiar with the National Weather Service online radar images may be interested to know that my system is patterned after those pages. If you look around on the Weather Service's site you can find information as to how to include images from the weather service in your own website. Yes they actually tell you how and give you permission to use live weather information from them. If you would like to use this style sheet technique, you must already have an understanding of html. You can reveal my style sheet coding by Right clicking a blank area of my truck cam popup window and chose View Source. The first part of the document contains the JavaScript used to refresh the images. Then the style sheet and page html. Warning: Absolute Positioning must be used with caution. Indiscriminate use can lead to some really serious problems on web pages. For information on how my truck cameras operate see my Mobile Camera page. |